


Despite the fun and excitement of RVing, accidents can happen during your adventures. An accident involving your RV slides can throw a serious wrench in your plans. If you want to enjoy uninterrupted experiences, you must do your best to protect yourself, fellow travelers, and your RV from accidents.
Here are five hacks you can use to accident-proof your RV slides during your travels. Let’s dive in!

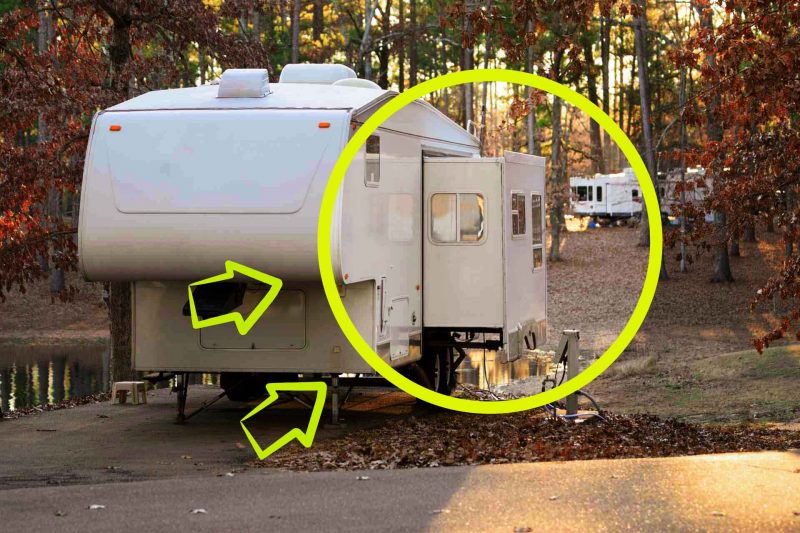
What Is an RV Slide?
An RV slide is a retractable space that increases the amount of usable room in an RV when you extend it. If you see an RV with a side sticking out, you’re looking at an RV slide. These are common on modern RVs, and you can typically find one to five slides on a rig.
The space on an RV slide typically contains a sitting or dining area in the main living room. However, it’s not uncommon to have beds or closets on a slide in the bedrooms. These spaces can extend and retract at the press of a button.
Always fully retract your slides before hitting the road to avoid potential issues. Depending on the RV, you may be unable to access portions of your rig when you retract the slides.
This is something to consider when shopping for an RV. Access to the restroom, refrigerator, and bedroom can be beneficial during travel days.
HOT TIP
Dumb Mistakes That Could Ruin Your RV
How Can Your RV Slides Get Damaged?
An RV slide can easily experience damage if you’re not careful when using them. The key to avoiding damage to your slides is awareness of potential hazards. Let’s examine some of the most common ways you can damage RV slides.
Water
When it comes to RV damage, water is your biggest enemy. Sealants on an RV can fail for various reasons, primarily due to age or wear. If there’s a place for water to get into an RV, water will find it. Unfortunately, many RVers don’t notice water damage until it’s too late.
Water damage in an RV slide can be an expensive repair. Depending on the severity of the situation, it could cost thousands of dollars and require a professional to fix it.
Your RV could be out of commission for weeks or possibly even months while repairs are made. However, if you leave it unaddressed, the damage won’t fix itself, and you could risk mold growing in your camper.
Debris
While a campsite in a thick forest may be appealing, it could cause damage to the slides on your RV. Pinecones, limbs, and other tree debris can often land on your slides. If you attempt to close your slides with debris sitting on top of them, you could cause severe damage to the rubber seals and other components.
However, it’s not just debris outside your RV that can be concerning. Many RVers have experienced issues with objects sticking under the slides or falling while moving their RV.
The mechanisms that allow the slide to move in and out are potent and can crush anything that gets in their way, including cabinets or children’s toys under the slide.
Expanding Into an Object
One mistake that can damage an RV slide is expanding it into an object. You must confirm that there is enough room to extend your slides fully every time you set up at a campsite. If not, you could do extensive damage to your camper.

Since every campsite is different, you must watch for electrical pedestals, water connections, trees, and other objects that could pose an issue. It can be helpful to measure the distance it takes to extend each of your slides fully.
Some RVers even mark the distance on a level or measuring stick that they keep easily accessible. Doing so allows them to quickly confirm that it’s safe to open their slides without damaging them.
Too Much Weight
While most RV slides can handle 600 and 1500 pounds, that’s not always the case. Many slides contain furniture and seating for multiple people. Depending on the people in your rig and how much furniture is on the slide, you could easily exceed the weight limit.
Putting too much weight on the slide can misalign the mechanisms and cause bending when trying to extend or retract the slides. This can damage the sensitive components and require a professional to re-align them.
The only way to avoid this potential danger is to be mindful of how much weight you’re placing on your slides.
5 Hacks for Accident-Proofing Your RV Slides
While you may be unable to prevent every accident with your RV slides, you can do your best to minimize the risks. Here are five hacks for accident-proofing your RV slides to keep you and your RV safe. Let’s get started!
1. RV Slide Toppers
If you want to prevent debris and other objects from damaging your RV slides, RV slide toppers are one option. These are awnings that attach to the side of an RV and automatically extend and retract with the slide. Any debris that lands on them when they extend will fall off as the toppers roll into themselves.
Depending on the number of slides on an RV, these can be expensive additions. However, it prevents you from climbing on your RV’s roof whenever you need to retract your slides. Without these, you’d likely need to haul a broom to the top to sweep off debris.
2. Waterproofing With Slide Out Seals
Because RV slides need to extend and retract, there will naturally be gaps around them. However, manufacturers use rubber seals to prevent wind, water, and other debris from getting into the rig. While these are typically watertight initially, they can fail over time, especially as the RV ages.
Check the seals on your slideout regularly and maintain them properly. Routinely apply a rubber seal conditioner to prevent the rubber from drying out and cracking. Depending on where you live, apply the conditioner every three to six months.
In addition, manufacturers use sealant anywhere two surfaces come together to avoid water from getting into the gap. Inspect these seals every 30 to 60 days and make necessary repairs as soon as possible. Because the key to waterproofing your slide-out seals is consistency, it’s best to have sealant and a caulk gun readily available.
3. Pool Noodles on the Corners
The corners of an RV slide can be incredibly sharp. Unfortunately, some manufacturers place slides in less-than-ideal locations and heights, especially near storage compartments.
There have been many horror stories of RVers hitting their heads on their slides. Luckily, a cheap and effective solution is to use a pool noodle to cover them.
To create your pool noodle covers for your RV slide, you’ll want to purchase a pool noodle and cut it into 12 to 16-inch chunks. Carve a V-shape out of the middle of each pool noodle chunk so it can easily fold and create a right angle.
You can then apply glue to hold the noodle at a right angle. It can be helpful to use tape to hold the noodle in place while the glue dries. Once the glue has time to dry, you can remove the tape.
Once you’ve removed the tape, take a knife and cut down the center of the noodle. Be careful not to cut entirely through the noodle, only down the inside. You may need more force when cutting through the glued area, but it shouldn’t be too challenging.
Place the pool noodle on the corners of any slides that could pose an issue for you or anyone around your rig. As long as you didn’t create too large of a gap when cutting the noodle, the covers should fit snugly on the corners of your slides.
4. Implementing a Checklist for Expanding and Retracting RV Slides
Checklists can help accident-proof many aspects of RVing, including your RV slides. We recommend having a detailed list for setting up and tearing down your RV. One of the items should include confirming there is ample room to retract your slides fully.

Measuring the distance necessary to fully extend your slides and marking it on a measuring stick, tape measure, or a level can be helpful. If you haven’t done this yet, it’s a good idea to have someone watch the slides as they open to confirm that there aren’t any issues.
5. Maintaining the Slide Out Motors
If you want to keep them running smoothly, slide-out motors and other mechanisms will require maintenance. However, in most cases, the maintenance is straightforward.
It’s best to regularly extend your slides and crawl under them to inspect the motor and other mechanisms. You may want to do this every other month if you’re full-timing or at the start and end of each camping season if you’re a seasonal camper.
Use a clean rag to wipe the dirt and debris off the moving mechanisms. You can then use a dry-lube spray specifically for the moving parts of a slide-out.
The silicone lube from 3-IN-ONE is one of the best items on the market. Generously spray the moving components and retract and extend each slide a few times to allow the lube to coat all surfaces.
Is Accident-Proofing Your RV Slides Beneficial?
By accident-proofing your RV slides, you can drastically reduce the chances of you or your RV experiencing damage. While accidents can happen despite your best efforts, you want to avoid them whenever possible.
A trip to the hospital or repair shop can ruin your RVing adventures and leave you with less money to spend on future trips. We recommend doing all you can to accident-proof your RV slides and other RV components.
Would you use any of these hacks on your rig?
If You Want the Latest Travel News, Join Our Mailing List
Don’t rely on biased RV industry news sources to keep you informed. Stick with Nomadic News. We publish articles and breaking stories that matter to you every weekday.