


Flowers are blooming, and the temperatures are rising. This can mean one thing — camping season is on the horizon. If you’re itching to take your rig out for the first adventure of the season, you might want to walk through our RV maintenance checklist to make sure your rig is ready for the season.
Today, we’re walking you through some essential maintenance tasks you don’t want to overlook. Let’s get started.

How Often Should You Do RV Maintenance?
RV maintenance can feel like a never-ending task; however, it’s essential to keep you and your rig safe on the road. You should check your owner’s manual to see what maintenance schedule your manufacturer recommends. This can help you avoid issues when having a problem fixed under warranty.
Generally, you can do most of your maintenance at the start or end of each camping season. However, some items, like the roof, may require you to check and maintain them more frequently to catch any issues before they become serious.
Staying up to date on your RV maintenance checklist is essential. Minor issues can become big if you don’t pay attention or delay getting them fixed.
When problems grow into bigger ones, so does the cost to repair them. So make sure you immediately address any issues with your RV.

What Are the Most Common Problems in an RV?
Some of the common problems in an RV are leaks in the plumbing and roof. Failing to winterize an RV plumbing system properly can lead to some surprises when you head out for your first trip.
If you live in an area with harsh winters, any water in your plumbing system can expand when it freezes and cause cracks and damage to fittings.
Leaks in your roof can also cause a lot of problems. Damage from leaks in the roof can hide behind the walls in your RV. You might not know you have an issue until it’s too late.
When you start to notice discolorations or changes in the wall, you could have a wall full of dangerous mold and potential structural issues.
HOT TIP
Sometimes floods and leaks are human error. Here are 10 times RVers flooded their own rigs.
How Do You Keep an RV Looking Like New?
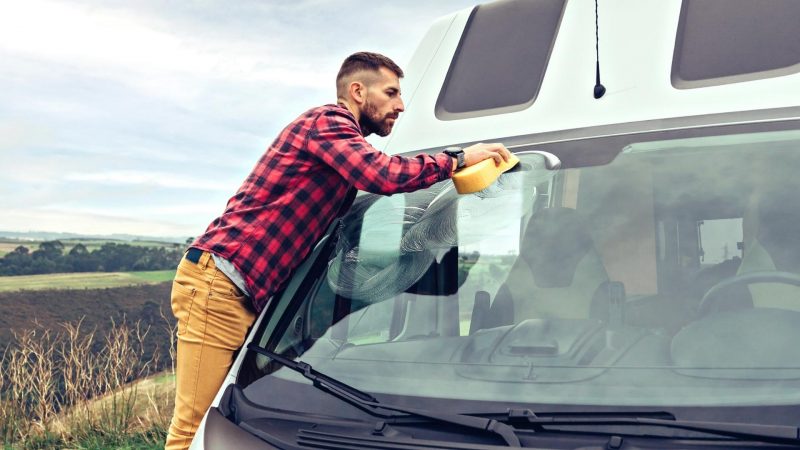
If you want to keep your RV looking new, it will take some effort. You’ll want to wash it a couple of times each camping season and apply protective coatings. This helps extend the life of the decals and paint.
How you store your rig when not in use will also help keep it looking like new. The sun can cause extensive damage to your RV’s roof, the decals, and the coloring.
If you want your rig to look new for years to come, covered storage will keep the harsh weather conditions from speeding up the aging process of your RV.

Here’s Your RV Maintenance Checklist
Some RV maintenance checklist tasks are easier than others. However, they’re all important to keep your rig in good condition.
You may need to grab a few supplies or a ladder to access the roof. After gathering the things you’ll need, you can quickly walk through this checklist.
✅ Clean Air Conditioner
This RV maintenance checklist task takes about 20 minutes to complete. You’ll need a ladder, a bottle of coil cleaner, a spray bottle with water, and some Nu-Calgon evaporator spray.
Next, turn off the power to your A/C unit before climbing on the roof. Take the cover off your A/C and look for the condenser coils.
Many coil cleaners come with a soft bristle brush to clean them. Make sure to clean up and down and not left to right, which can damage them.
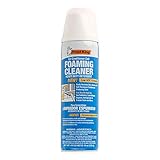
- Heavy-duty foam dissolves stains, removes grease & oil, and loosens dirt
- Cleans coils, fan blades, and reusable air filters
- Neutralizes odors from standing water in drain pans
- Air conditioner coil foaming heavy duty detergent cleaner with low VOC formula
- Pleasant lemon fragrance leaves deodorized, fresh smell after cleaning. No rinse necessary.
After removing debris from the coils, spray them with the foam cleaner. You’ll want to let this spray sit on them until it begins to disappear. Then, take your spray bottle and wash the condenser coils clean.
Move to the other side of the air conditioner and find the evaporator coils. Use the bristle brush that came with the cleaner to clean these similarly.
Spray the evaporator coils with the Nu-Calgon evaporator spray. This spray doesn’t require you to wash it clean. Then you can then put the cover back on your AC unit and head inside.
Finally, you’ll want to make sure all your filters are clean. Like in a home, your A/C filters prevent dust and debris from clogging up your unit. The more you use your RV, the more you’ll need to check these. If the screens start to stretch or show signs of damage, you’ll need to replace them.
✅ Test Safety Equipment
The safety equipment in your RV will only do its job if it’s in working order. You must check your smoke and carbon monoxide detectors twice yearly or at the beginning of each camping season. Replace batteries and check expiration dates to ensure they work correctly.
You’ll also want to check your fire extinguisher. These tiny devices can save lives in an emergency. They can help prevent a fire from spreading and getting out of hand.
While most RVs come with at least one fire extinguisher, we recommend having one in your vehicle and an outside storage compartment. You want them in an easily accessible location if you need to use them.
✅ Check Seals
One RV maintenance checklist item that many forget is to check your seals. How often you should do this will depend on your manufacturer’s recommendations.
Some will void warranties if you don’t inspect the seals every 60 or 90 days and reapply sealant to any necessary spots. You want to look around any areas with sealant for any signs of cracking or peeling.

Check around the edges of your roof, vents, and windows. Your roof will likely use a white type of roof sealant. Dicor makes some great products if you need to reapply.
For around the windows and edges of your RV, Geocel clear sealant works great. Take your time and cover any areas that seem to be aging.

- Flash Point: 93.0 Degrees_Celsius
- Excellent Adhesion To Many Surfaces, Even When Damp
- Resealable; May Be Applied Over Itself
- Paintable And Resists Dirt Pick-Up
✅ Examine Tires
You want to examine your tires at the start of each camping season. Even if you don’t put a lot of miles on them, the weather can accelerate the aging process if your RV sits in storage. This could cause them to dry or crack, which can be very dangerous when driving.
You also want to look for any signs of uneven tire wear. This could signify that something is out of alignment or if you have a suspension issue. An issue causing your tires to wear unevenly could result in a blown tire, which can cause deadly accidents and damage your RV.
Generally, most tire manufacturers recommend replacing your tires every six years. So, even if you only take your RV out a handful of times, you should make sure it looks good before hitting the road.
✅ Sanitize Freshwater System
Sanitizing your freshwater system is an essential part of your RV maintenance checklist. It makes it possible to shower, wash dishes, and wash your hands. Even if you don’t drink the water, ensure no harmful bacteria or other gunk gets in your water system.
Sanitizing your freshwater system can take some time and require connecting to a sewer. Some RVers will book a site at a campground when they know it’s time for them to sanitize their system.
A campsite with full hook-up connections is the best place to do this. You’ll have access to plenty of water and can easily dump your tanks as needed.
You’ll want to use a bleach-water mixture to siphon into your freshwater tank. Once you fill your freshwater tank with the cleaning solution, you must go to each fixture in your rig and turn on the water until you smell the bleach solution.
Then, turn off the water and move to the next one until you have covered all the faucets in your rig. Don’t forget showers, toilets, and outside sinks and showers.
Once the cleaning solution has run through all your fixtures, let the mixture sit for approximately 6 to 12 hours. After, you can start pumping in water until you no longer smell bleach.
Open your gray tank to avoid filling it up. Finally, you can run fresh water through the entire system to rid all of the cleaning solutions from your water lines and tanks.

- Two 55 ounce bottles of Splash-less bleach, Regular
- No splash formula
- With a unique patented formula, Clorox Splash-Less Bleach includes surfactants to help clean soils and thicken the formula for less spilling and splashing
- 10x deep cleaning benefits – Removes 70% more stains, whitens your whites, and cleans and deodorizes your home.
✅ Lubricate Slides
Keeping your slides lubricated is a great way to extend their life and reduce the chances of any issues. RVCare’s 3-in-1 slide-out spray can make this an effortless task.
First, open your slides and crawl under them. Use a rag or paper towel to wipe down the gears and moving parts to clean off any dirt and debris built up during your travels.
You can then take the 3-in-1 slide-out spray to generously cover the gears and other moving parts. Close the slides and listen for any noises. You’ll want to open and close each one multiple times to ensure all components get the necessary lubrication.

- Includes: One (1) RVcare Slide-Out Silicone Lube 11 oz Bottle, One (1) RVcare Window and Track Dry Lube 10 oz Bottle, One (1) Rvcare RV Rubber Seal Conditioner 11 oz Bottle, & One (1) Trailer Hitch Gel Lub 10 oz Bottle
- Slide-Out Silicone Lube is Specially Formulated to Lubricate, Waterproof and Prevent Rust and Corrosion on all Types of Slide-Out Mechanisms
- Window & Track Dry Lube helps keep your RV windows and door sliding smoothly and silently
- RV Rubber Seal Conditioner is a long lasting water resistant formula which reducles friction and wear; contains UV inhibitors which help prevent cracking and fading
- Trailer Hitch Gel Lube provides a thick protective coating that reduces friction and wear on hitch balls
✅ Top Off Batteries
The final step on our RV maintenance checklist is to top off your batteries. Unless you’ve upgraded your RV’s battery to an AGM or lithium battery, you must check the fluids.
Deep cycle batteries require a certain amount of electrolytes to cover the plates to protect them. The older it is, the more often you’ll need to keep up with this task. Ensure you have plenty of distilled water, as you can’t use regular tap water with your battery.
Ensure that there is a full charge before starting this project. You can then remove your battery from the camper and wipe it down. You’ll want to use a flat-head screwdriver to remove the lid and peek inside to see the water level in your battery cells.
Then, place a funnel in each cell and add enough water to top it off. You may need another gallon or two of distilled water, depending on how empty your cells are.
Once you fill it back up, put the covers back on and put the battery back in place. Connect it to the RV and ensure everything works well. You’ll need to do this the more you use your batteries.
If you regularly drain and charge your battery, you might want to do this every 30 days. If you spend most of your time in campgrounds or only camp connected to a power source, you can likely get by doing it at the start and end of every camping season.

- PROFESSIONAL GRADE: Convenient, built to last, a go-to tool for your automotive needs; Easy-grip handle makes sure you are in full control while filling; Automatic shut-off feature prevents overfilling, and the no-drip valve tip keeps spills at bay.Fit Type: Universal Fit
- NO MORE SPILLS: A super smooth, spring-loaded, double action, fast flow valve tip prevents after-drip for a spill free performance, every time; Keeps you and your workspace clean and mess-free
- AUTOMATIC SHUT-OFF: Battery filler shuts off automatically when the battery cell reaches the proper fill level, ensuring optimum battery performance with no overfilling
- DURABLE CONSTRUCTION: Rugged polyethylene construction ensures long life; Safe for use with battery acid; Stops surface discharge caused by a wet battery
Are RVs Hard to Maintain?
It might seem intimidating at first to think about maintaining an RV. However, you can quickly complete most of the tasks each camping season with an RV maintenance checklist.
You can stay on top of your repair needs and ensure your RV lasts for years.
RVs aren’t as hard to maintain as you might think. The more time you spend working on your RV, the more you’ll see they’re pretty simple. While some things will require your attention, you can still have an enjoyable time whether you go camping for the season or travel full-time.
What’s your least favorite RV maintenance task?
If You Want the Latest Travel News, Join Our Mailing List
Don’t rely on biased RV industry news sources to keep you informed. Stick with Nomadic News. We publish articles and breaking stories that matter to you every weekday.
Last update on 2026-06-23 / Affiliate links / Images from Amazon Product Advertising API